
![Hands on with the ANET ET4 [Source: Fabbaloo]](https://fabbaloo.com/wp-content/uploads/2020/05/et4-ready-1_img_5eb08effb7d0c.jpg) Hands on with the ANET ET4 [Source: Fabbaloo]
Hands on with the ANET ET4 [Source: Fabbaloo]
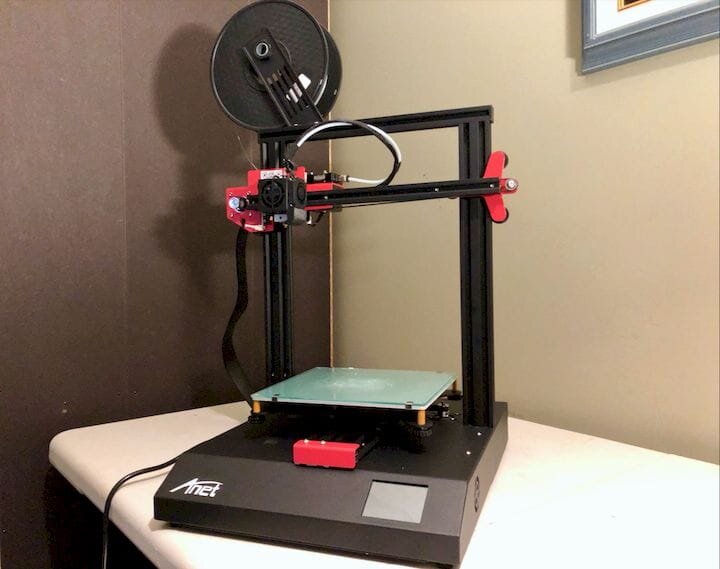
We were fortunate to obtain a brand-new ANET ET4 3D printer and spent some time giving it a good test.
This is part 2 of a 3 part series:
ET4 3D Printer Setup
Setting up the ET4 is also relatively simple, as it really involves only leveling the bed and installing a spool of filament.
The first thing you must do is to coarsely adjust the bed to a state close to level manually. You are instructed to manually move the carriage down until the nozzle is a “close distance” to the print plate at the front left corner. For me, this meant inserting a sheet of plain paper to provide a measurement of this distance.
![ANET ET4 coarse leveling [Source: Fabbaloo]](https://fabbaloo.com/wp-content/uploads/2020/05/et4-manual-level-1_img_5eb08effdf211.jpg) ANET ET4 coarse leveling [Source: Fabbaloo]
ANET ET4 coarse leveling [Source: Fabbaloo]
Then you simply adjust the easily turnable spring-bolt mechanism to fine tune the distance from the nozzle to the bed. This is repeated in all four corners of the tempered glass print plate. I simply tightened the gap until it just started catching on the paper in each corner.
At this point the print plate is mostly level, but to ensure perfection an automated leveling system is next.
![ANET ET4 autoleveling panel [Source: Fabbaloo]](https://fabbaloo.com/wp-content/uploads/2020/05/image-asset_img_5eb08f000ecc0.jpg) ANET ET4 autoleveling panel [Source: Fabbaloo]
ANET ET4 autoleveling panel [Source: Fabbaloo]
Leveling is automated, as you might not expect to see on such a low-priced machine.
It is very straightforward, but requires you to temporarily install a special sensor on the hot end nozzle. This sensor maps the height of 25 points (5 x 5) automatically. Then, during printing, the ET4 uses this information to ensure a consistent distance from the print plate.
Loading filament is also trivial. The spool simply hangs on a mount point above the gantry, and filament is manually inserted through to the extruder.
![ANET ET4 filament path, from above [Source: Fabbaloo]](https://fabbaloo.com/wp-content/uploads/2020/05/image-asset_img_5eb08f00339ab.jpg) ANET ET4 filament path, from above [Source: Fabbaloo]
ANET ET4 filament path, from above [Source: Fabbaloo]
The filament path includes a pass through a filament-out detector, as seen here. If the filament runs out during a print job, the ANET ET4 will pause and allow you to change the material, thus you won’t lose a print due to partial filament spools.
A few touches on the control panel set the hot end to a target temperature. When the temperature is achieved (in my case for PLA, 200C), the extruder slowly feeds the filament all the way through to the nozzle.
Eventually you’ll see fresh filament emerging from the nozzle.
You’ll also need to insert the microSD card into the tiny slot on the left side of the machine to enable access to the sample print files. The card slot is located well, as there it’s easy to access and there’s no danger of dropping the tiny card into the mechanism.
The machine is now ready for printing.
ANET ET4 Features
Before we go too much further, it might be a good idea to review some of the ET4’s specifications:
-
Open-air gantry system
-
Single hot end, 0.4mm nozzle
-
Maximum hot end temperature of 250C
-
Bowden extrusion system
-
Quiet wheel-based motion system
-
Tempered glass print plate
-
Heated plate up to 100C
-
Build volume of 200 x 200 x 250 mm
-
Automated mesh bed leveling
-
MicroSD card interface
-
USB port for direct printing
-
Able to 3D print PLA, PETG, ABS (small prints only), and similar materials
-
Manual bed leveling & calibration
-
Color touchscreen interface
-
Rigid aluminum extruded frame
ET4 Print Operations
Launching and managing 3D printing jobs on the ET4 is very straightforward.
Pressing the huge “Print” button shows a list of files present on the microSD card. You simply select one and confirm it’s to be printed.
![ANET ET4 front panel wraps long file names poorly [Source: Fabbaloo]](https://fabbaloo.com/wp-content/uploads/2020/05/et4-text-wrap-1_img_5eb08f0058f02.jpg) ANET ET4 front panel wraps long file names poorly [Source: Fabbaloo]
ANET ET4 front panel wraps long file names poorly [Source: Fabbaloo]
One issue I noticed later on is that the display doesn’t handle longer file names properly, as there isn’t enough space for them. However, with a small number of files it’s pretty easy to identify which file is which.
During 3D printing operations the ANET ET4 displays buttons on the control panel that allow you to tweak the settings, should you wish to override the settings baked into the GCODE.
![ANET ET4 print settings adjustments [Source: Fabbaloo]](https://fabbaloo.com/wp-content/uploads/2020/05/image-asset_img_5eb08f008036a.jpg) ANET ET4 print settings adjustments [Source: Fabbaloo]
ANET ET4 print settings adjustments [Source: Fabbaloo]
For example, if you wanted to raise the print plate temperature to 65C instead of 60C, it’s only two touches: one to select the bed temperature and another up arrow to raise the temperature 5C.
One other minor annoyance I encountered was that it seems the ET4 does not re-read the microSD card, except when booting. This means that if you pull the card to place a new GCODE file on it, you’ll have to reboot the ET4 for it to recognize the new file.
The most surprising thing about the ET4 is its noise level — there isn’t any. This machine is simply the quietest 3D printer I’ve ever used.
The motion system is made from these hard rubber wheels that seem much quieter. The stepper motors are almost unnoticeable unless you get very close. I measured the “noise” at only 40dB at a distance of 1m from the ET4. That’s very, very quiet.
How quiet is this machine? I did notice it making some unusual creaking and ticking noises. They were very subtle, however, and I had to lean in close to figure out what was going on. It turned out this was the noise of the belt creaking as it moved. I then realized that likely all belt-driven 3D printers make similar noises, but it’s that you cannot hear them due to other noises being produced.
We are told that the quietness is largely due to the use of TMC2208 stepper drivers. I can’t tell you how big a change this is. Having always used noisy 3D printers, it seems quite magical to have a silent machine.
However, it turns out that this quiet feature is only available when purchasing from ANET’s online store, as models sold by others may not include these special drivers. You can find their web shop here.
The ANET ET4 is priced at US$249 on ANET’s web store. If you’d like to buy one, we’ve made arrangements for you to receive a discount of 10% if you use secret code “FABBALOO” at checkout.
Alternatively, if you’d prefer to purchase one on Amazon, we’d truly appreciate if you used our link to do so, right here. It won’t cost you anything and helps support this publication.
This is part 2 of a 3 part series:
Via ANET