
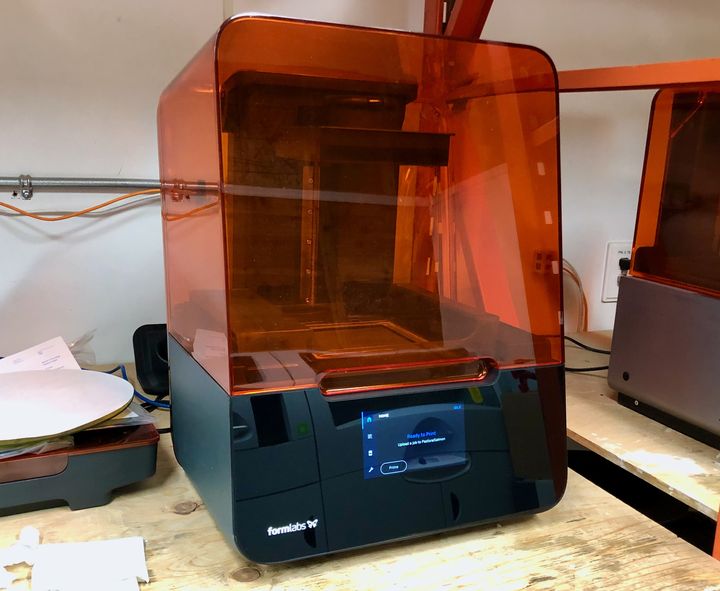
I had the chance to put together a Formlabs Form 3 SLA 3D printer and found the device a great improvement over the Form 2.
This is part one of a two-part series on the Formlabs Form 3 3D printer. Please read part two.
Formlabs has now released three “forms” of its flagship SLA 3D printer, first with the Form 1, then followed by the very popular Form 2, and now the Form 3. This latest device incorporates all of the learnings and more from previous device designs.
The Form 3 sits in an unusual space in the market. It is quite a bit more expensive than basic desktop SLA or LCD-style resin 3D printers, but at the same time it is far less expensive than commercial offerings for high-end SLA resin 3D printers.
The Form 3 is thus not targeted at hobbyists, but instead is intended to be used for commercial use in applications such as dental, professional model-making, high-end prototyping and in some cases, end-use part production.
Unboxing The Form 3
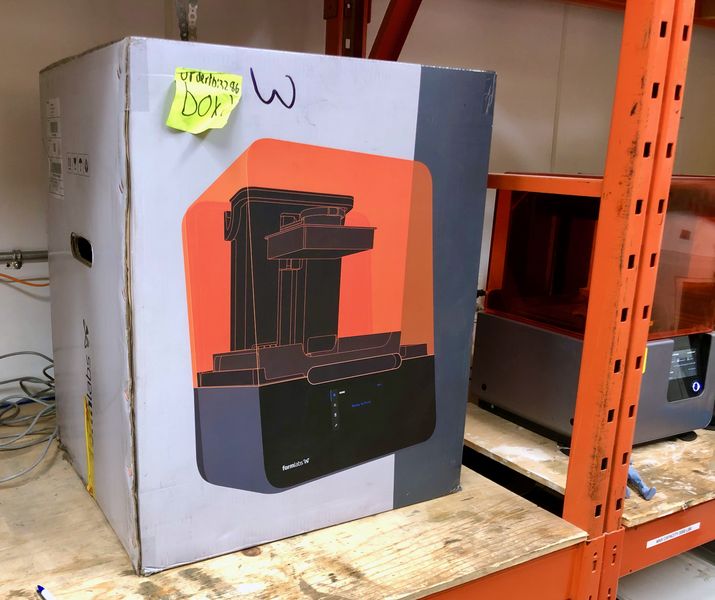
After selling tens of thousands of units, Formlabs has clearly figured out how to pack a 3D printer safely.
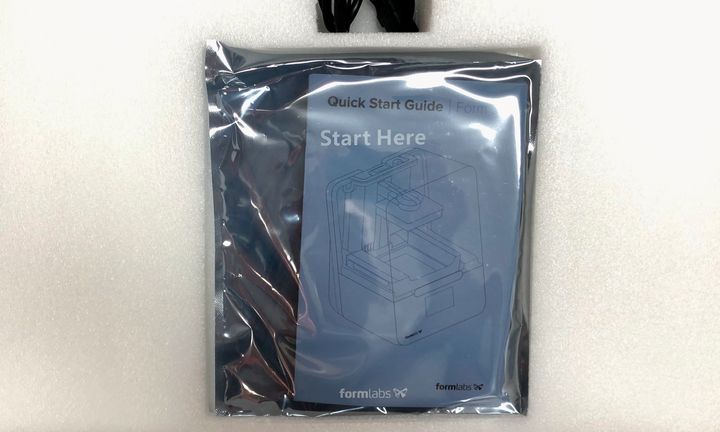
Upon opening, you’re greeted with this quick start guide, which is going to be quite helpful for novice users who may otherwise be baffled by the prospect of setting up a 3D printer.
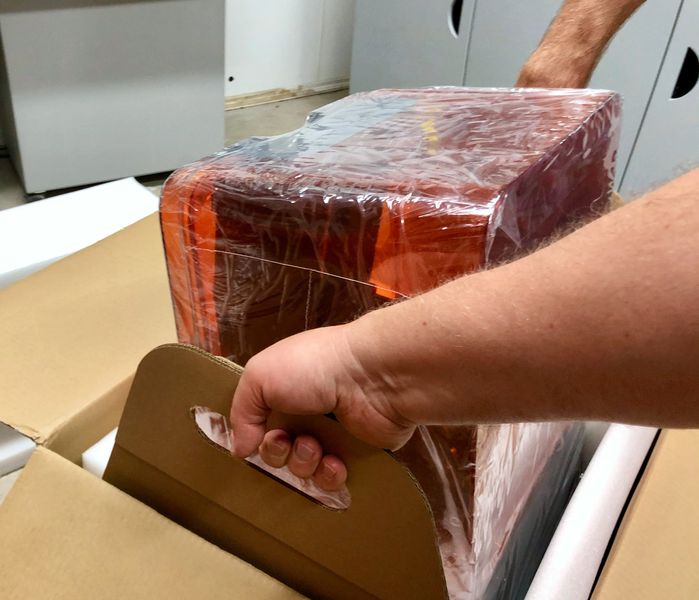
One very interesting packaging feature is these lift handles. Many times I’ve had challenges pulling out the main unit from a shipping box, and these make the prospect a great deal easier. I wish every 3D printer was packed this way.
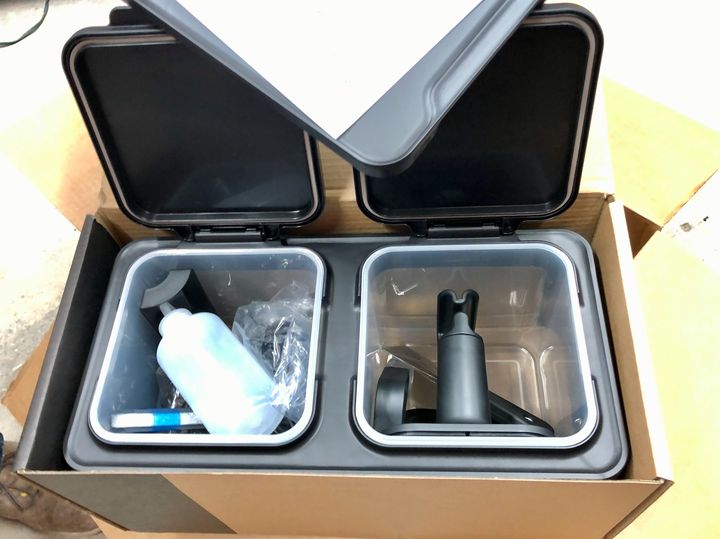
There’s one more thing that comes with your Form 3: post-processing equipment. There’s two tubs provided for washing freshly completed prints with IPA. One is the “dirty” tank, and the other is intended to be the “clean” tank that finishes the cleaning process. I chose not to use either of these as we already had Form Wash and Cure stations handy in the lab.
There’s not a lot else in the box, as the Form 3 is essentially fully assembled. You’ll also find the power cord in the box, and that’s about it.
Setting Up The Form 3
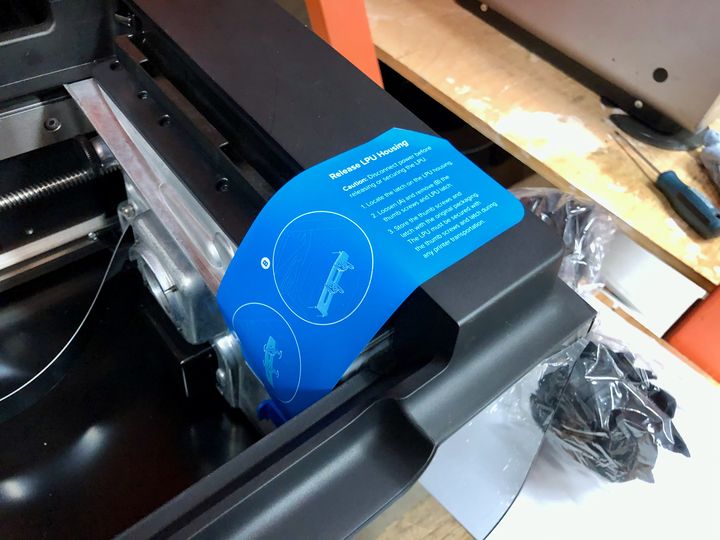
There’s one tricky item that must be done to prep the Form 3 before use: remove the shipping latch. This is a pair of bolts that are holding down the LPU housing, which must not move during shipment or else it could be damaged.

Removing the bolts releases the LPU housing and it can move freely. However, if at some point in the future the device is to be moved, the shipping latch must be reinstalled. This means you should keep the two bolts safely nearby for future use.
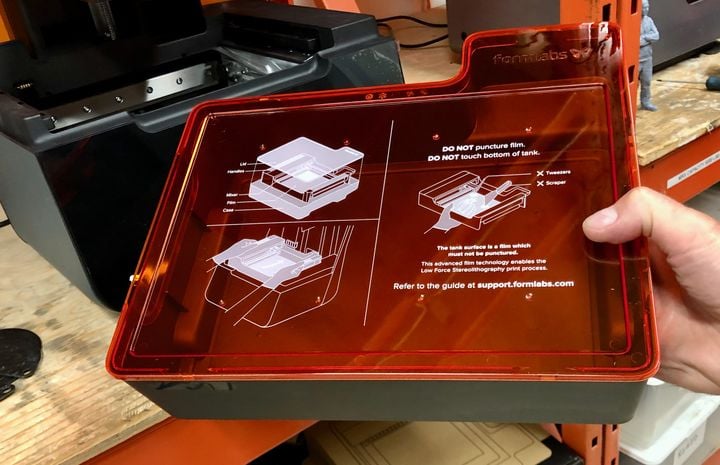
The remaining item for setup is to prepare a resin tank. I say “a” instead of “the” because on Formlabs equipment the tanks are matched to the material once used. Unlike many other 3D printers that come with a single resin tank that you must fill with whatever resin you’re using, the Form 3 has swappable resin tanks. Initially the tanks obtained from the company are “generic”. However, if resin is used in a tank it is then registered for use only with that same material from then forward.
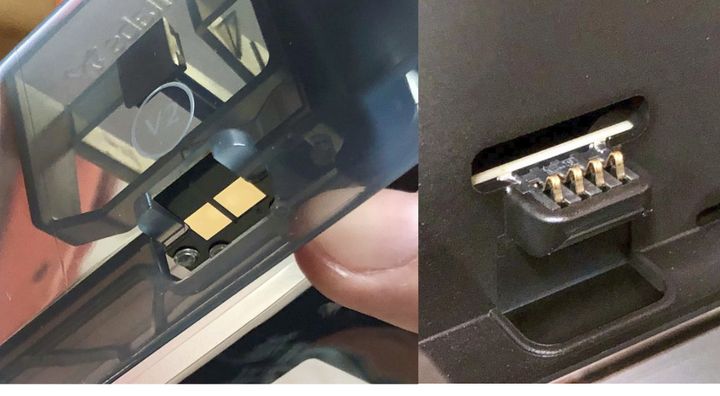
How is this done? It turns out each resin tank has a hidden serial number. The Form 3 reads this number through an electronic port shown above.
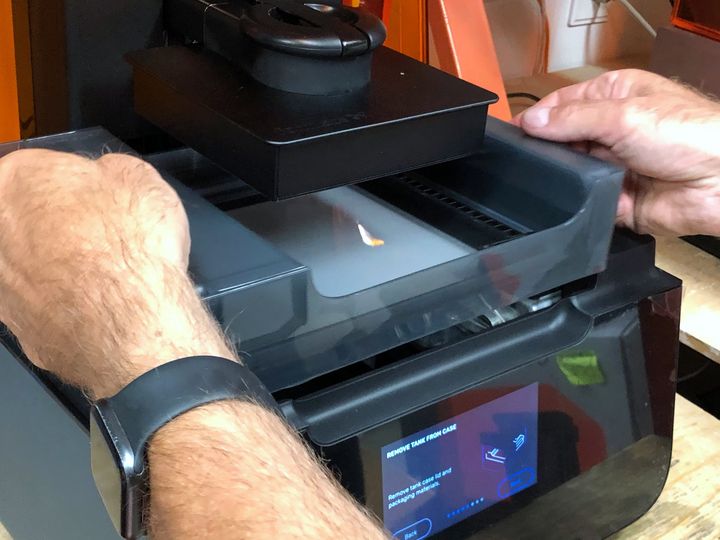
When a tank is inserted the machine reads the number and then “knows” whether the tank has been used or is already assigned to a material.
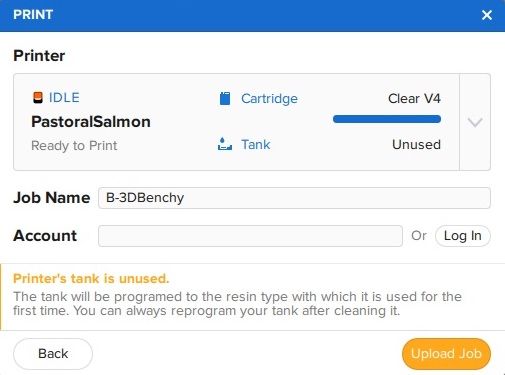
Theoretically one could flush a tank and put in a different material, but that’s just risking quality of the prints, which is not something Formlabs wants users to encounter. Thus they use this tank assignment system, which was also present on the Form 2. It does, however, make changing materials extremely easy: just remove the tank and put another one in. The rest is mostly automatic.
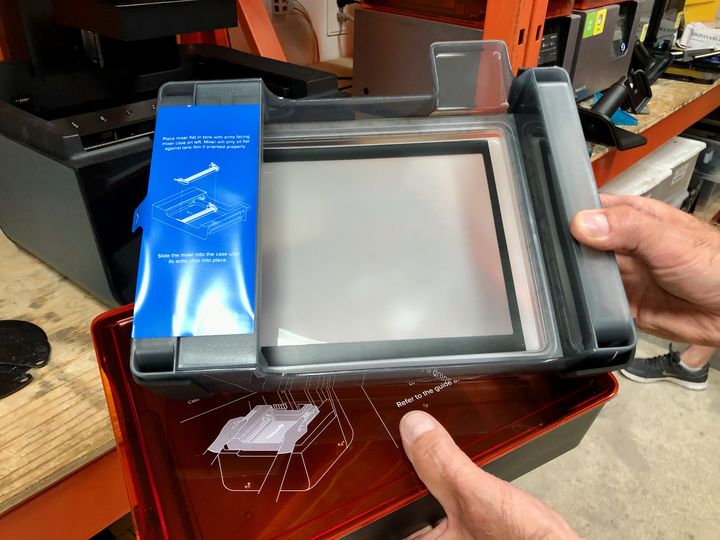
One very good improvement I observed with the Form 3 tanks is the cover. Note that the cover is transparent, but blocks UV due to the orange color. This allows a Form 3 operator to simply put a lid on an unused tank for storage.
I mention this because Form 2 users did not have this option: storage of partially used tanks became a bit of an issue, and some operations would use plastic tubs to hold these tanks, like this:

When the machine is powered on it immediately welcomes you with a startup wizard. This is great news for novices who are nervous about machine setup. Also there’s not that much to do.
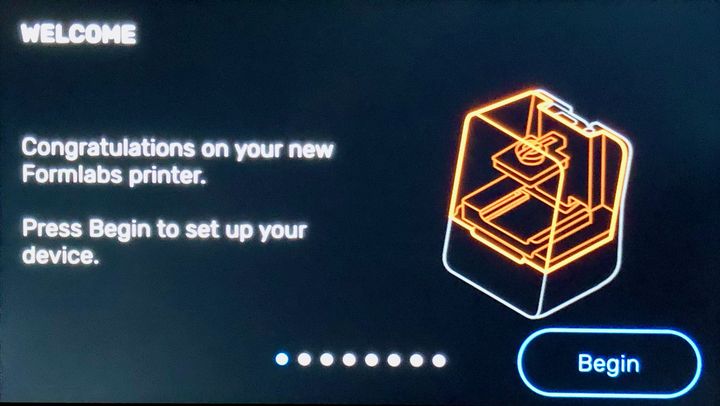
One thing you must do is level the machine. This is important because the resin tank should be near-level because you don’t want resin slopping over the sides of the tank.

Fortunately, the setup wizard has a very easy to use visual procedure for leveling. The display, shown here, changes as you rotate one of the four feet with the provided “foot keys”. We were able to level the machine within a minute or two.
The Form 3’s material is obtained from resin cartridges, purchasable at Formlabs. These turn out to be exactly the same type as used on the Form 2, so Form 2 users with an inventory of materials won’t be losing them when upgrading to a Form 3.
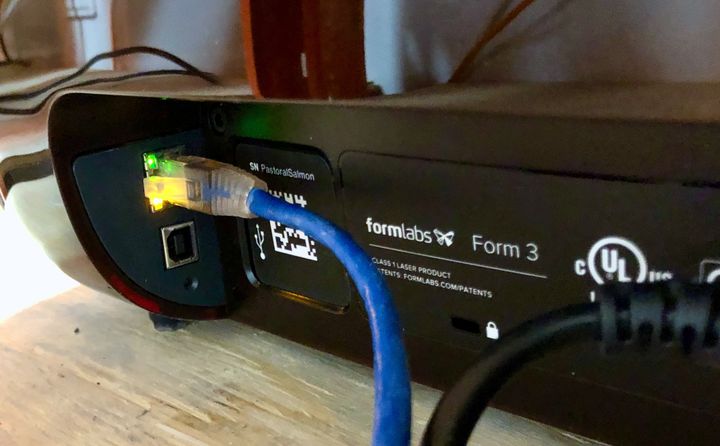
The network cable must be plugged into the rear RJ45 jack, normally an easy step. However, I noted that the network cable receptacle is positioned at 90 degrees to the rear, and I found this made it tricky. You have to awkwardly curl your hand to find the plug, and this is hard to do without seeing the jack. You really, really, want to simply spin the machine around to see the jack, but you can’t because you just leveled the machine and don’t want to do that again.
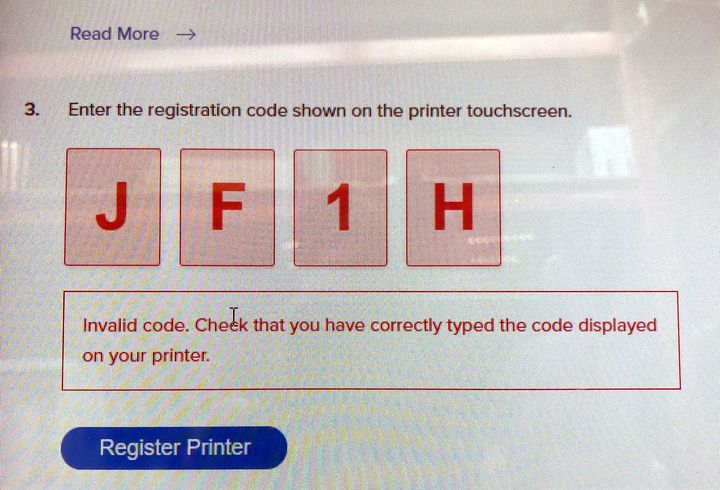
One issue we encountered during setup was machine registration. The idea here is that the machine produces a unique code, and that must be typed into your online Formlabs account. This associates your 3D printer with your account. However, we were never able to make this work, as the code was considered invalid. A search of support forums showed many people having a similar issue.
However, the Form 3 can continue to operate anyway, as the device is detected by Formlabs’ PreForm software for job preparation. Once detected, you can easily load jobs and communicate with the device.
This is part one of a two-part series on the Formlabs Form 3 3D printer. Please read part two.
Via Formlabs